Create and update strategies
Use this guide to configure a strategy, check its recipients and schedule, and request that it starts.
Before you begin
- Prepare a template for the channel.
- Identify a contact list or prepare a CSV/XLSX audience file.
- Define the delivery frequency, schedule, and time zone.
- Identify the provider and sender available for the channel.
From Strategies, open Create strategy and select Assisted or Advanced.
Assisted creation
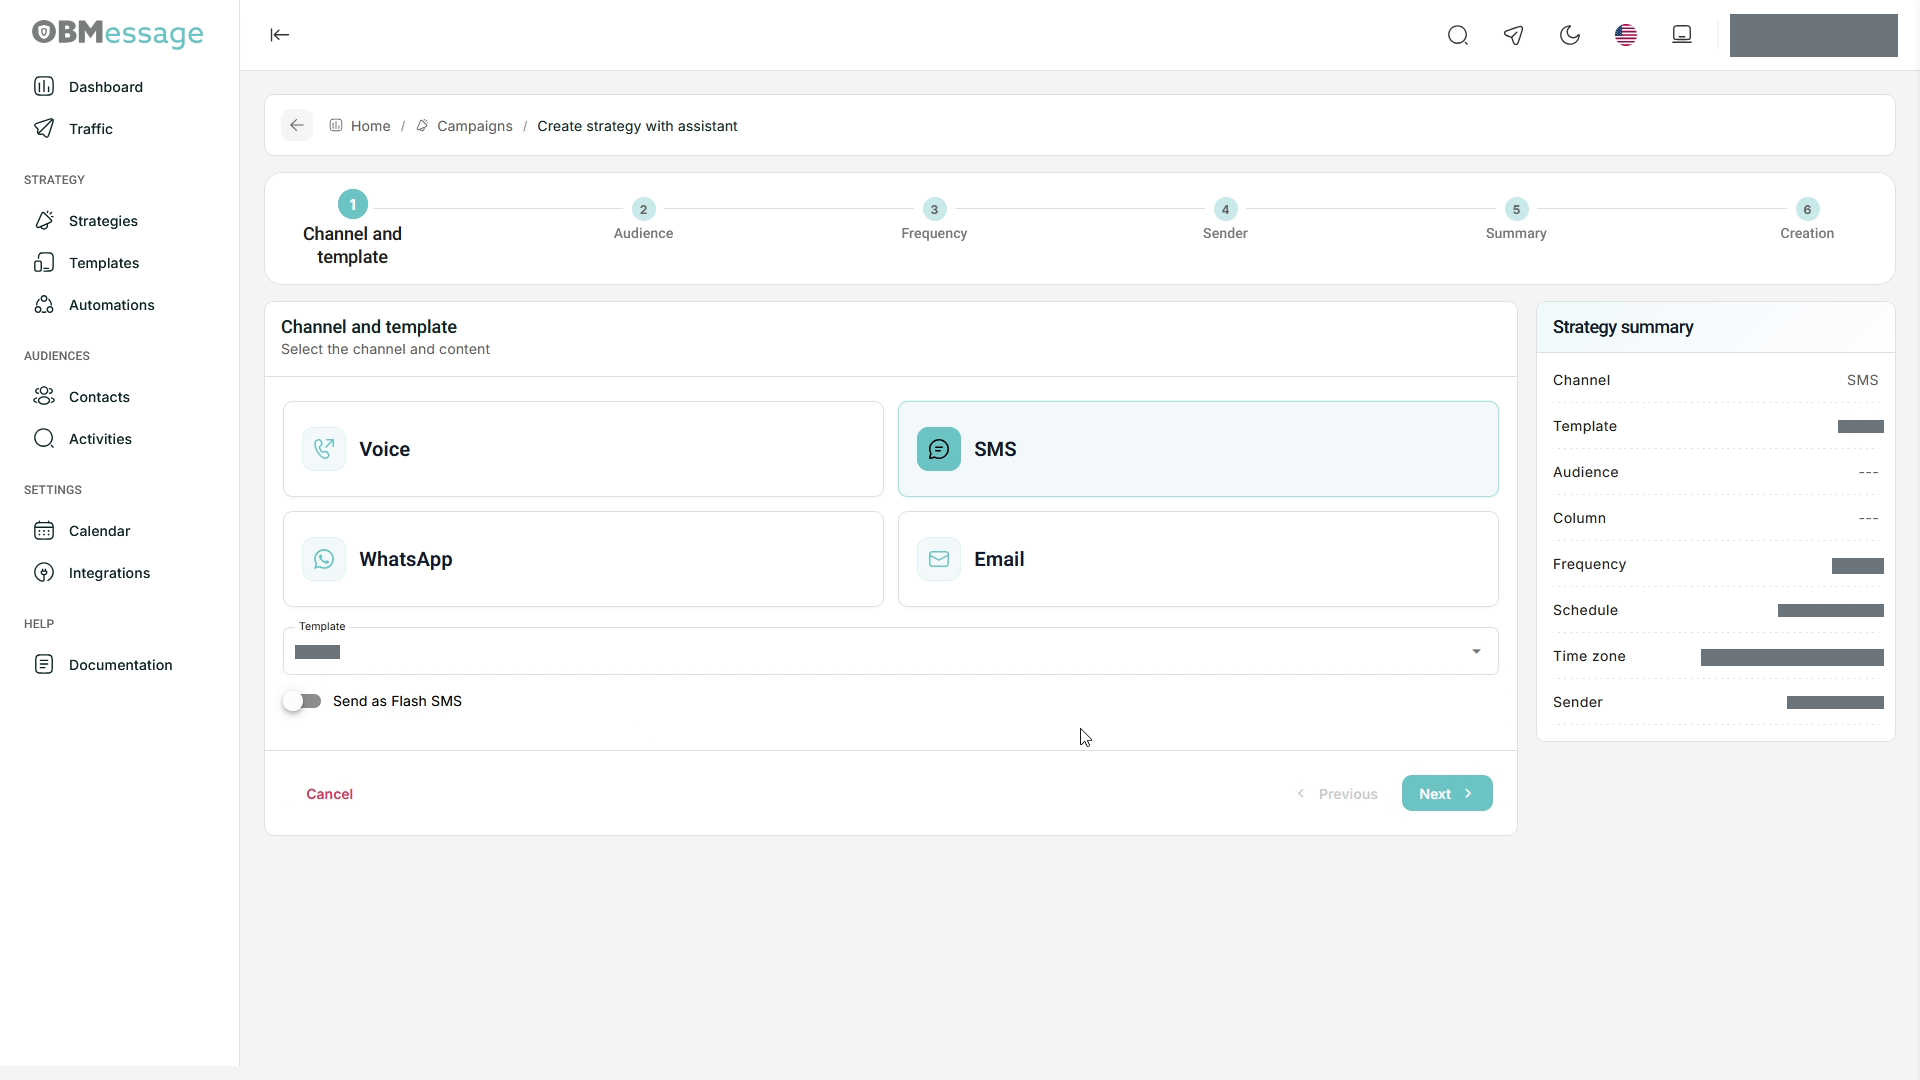
Complete the steps in order. Use Next to continue and Previous to correct an earlier step. The Strategy summary panel lets you review the accumulated configuration.
1. Channel and template
Select Voice, SMS, WhatsApp, or Email and choose a template for the channel. For SMS, configure Send as Flash SMS only when you need that mode.
2. Audience
Choose one of these options:
- Existing list: select the list and the Contact column containing the message destination. Available columns depend on the list.
- Upload file: select a CSV or XLSX file, specify whether it has headers, and choose the encoding used by the file.
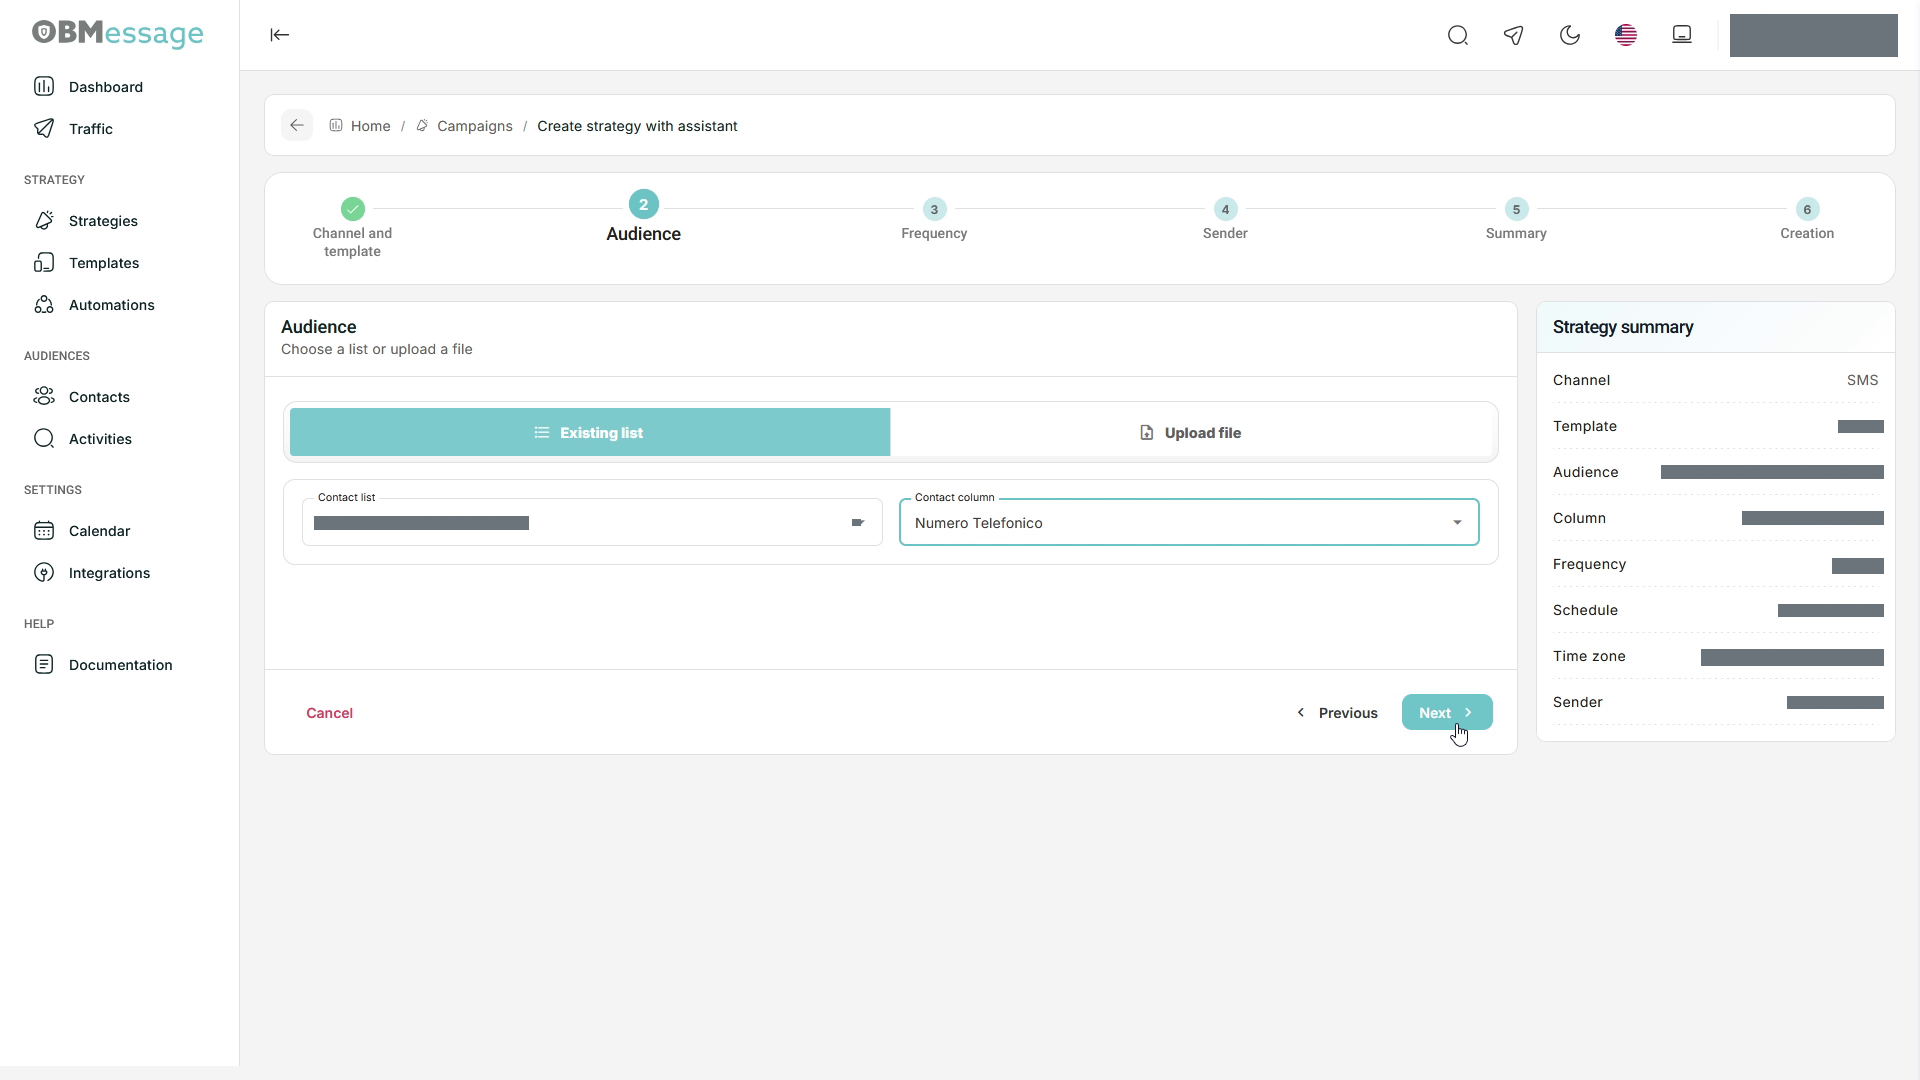
Check that the destination matches the channel: phone number for Voice, SMS, and WhatsApp; email address for Email. Resolve any file validation before continuing.
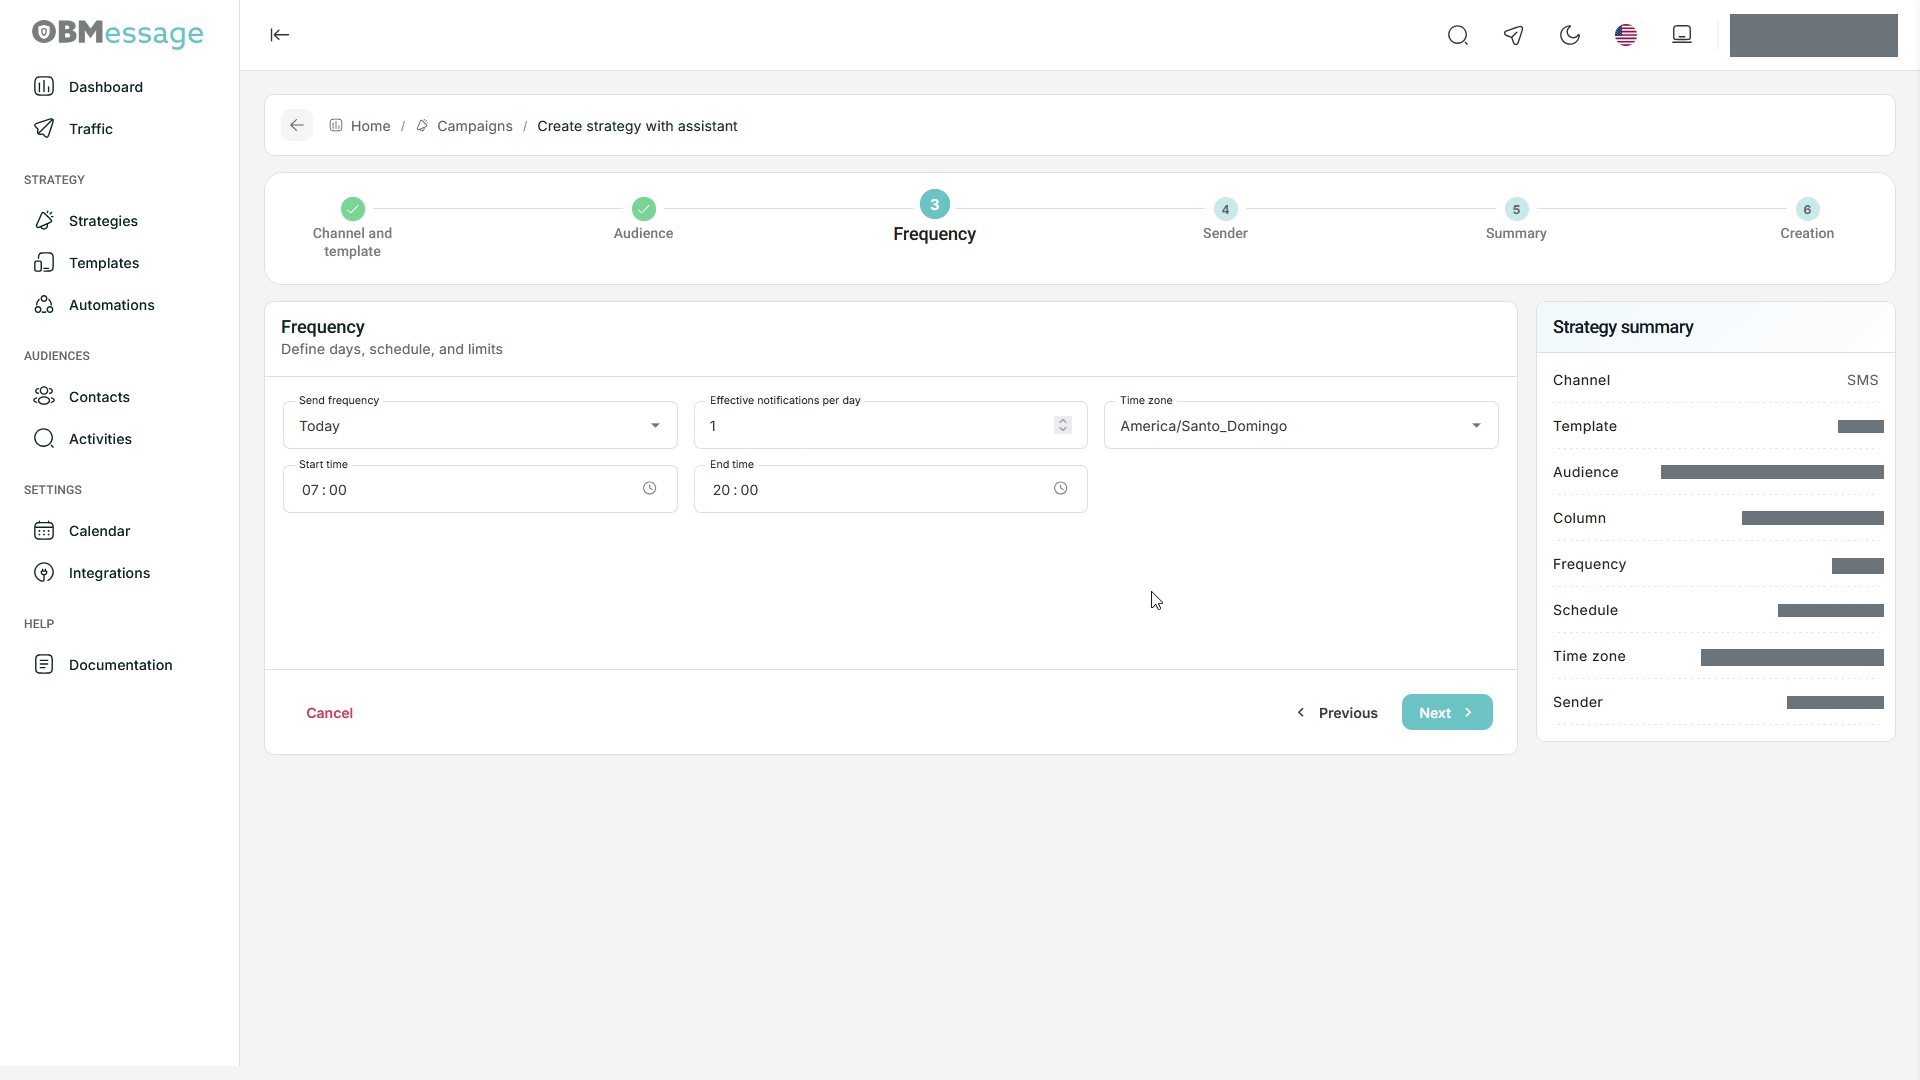
3. Frequency
Configure Send frequency, Effective notification per day, Time zone, Start time, and End time. Check the schedule against the selected time zone.
4. Sender
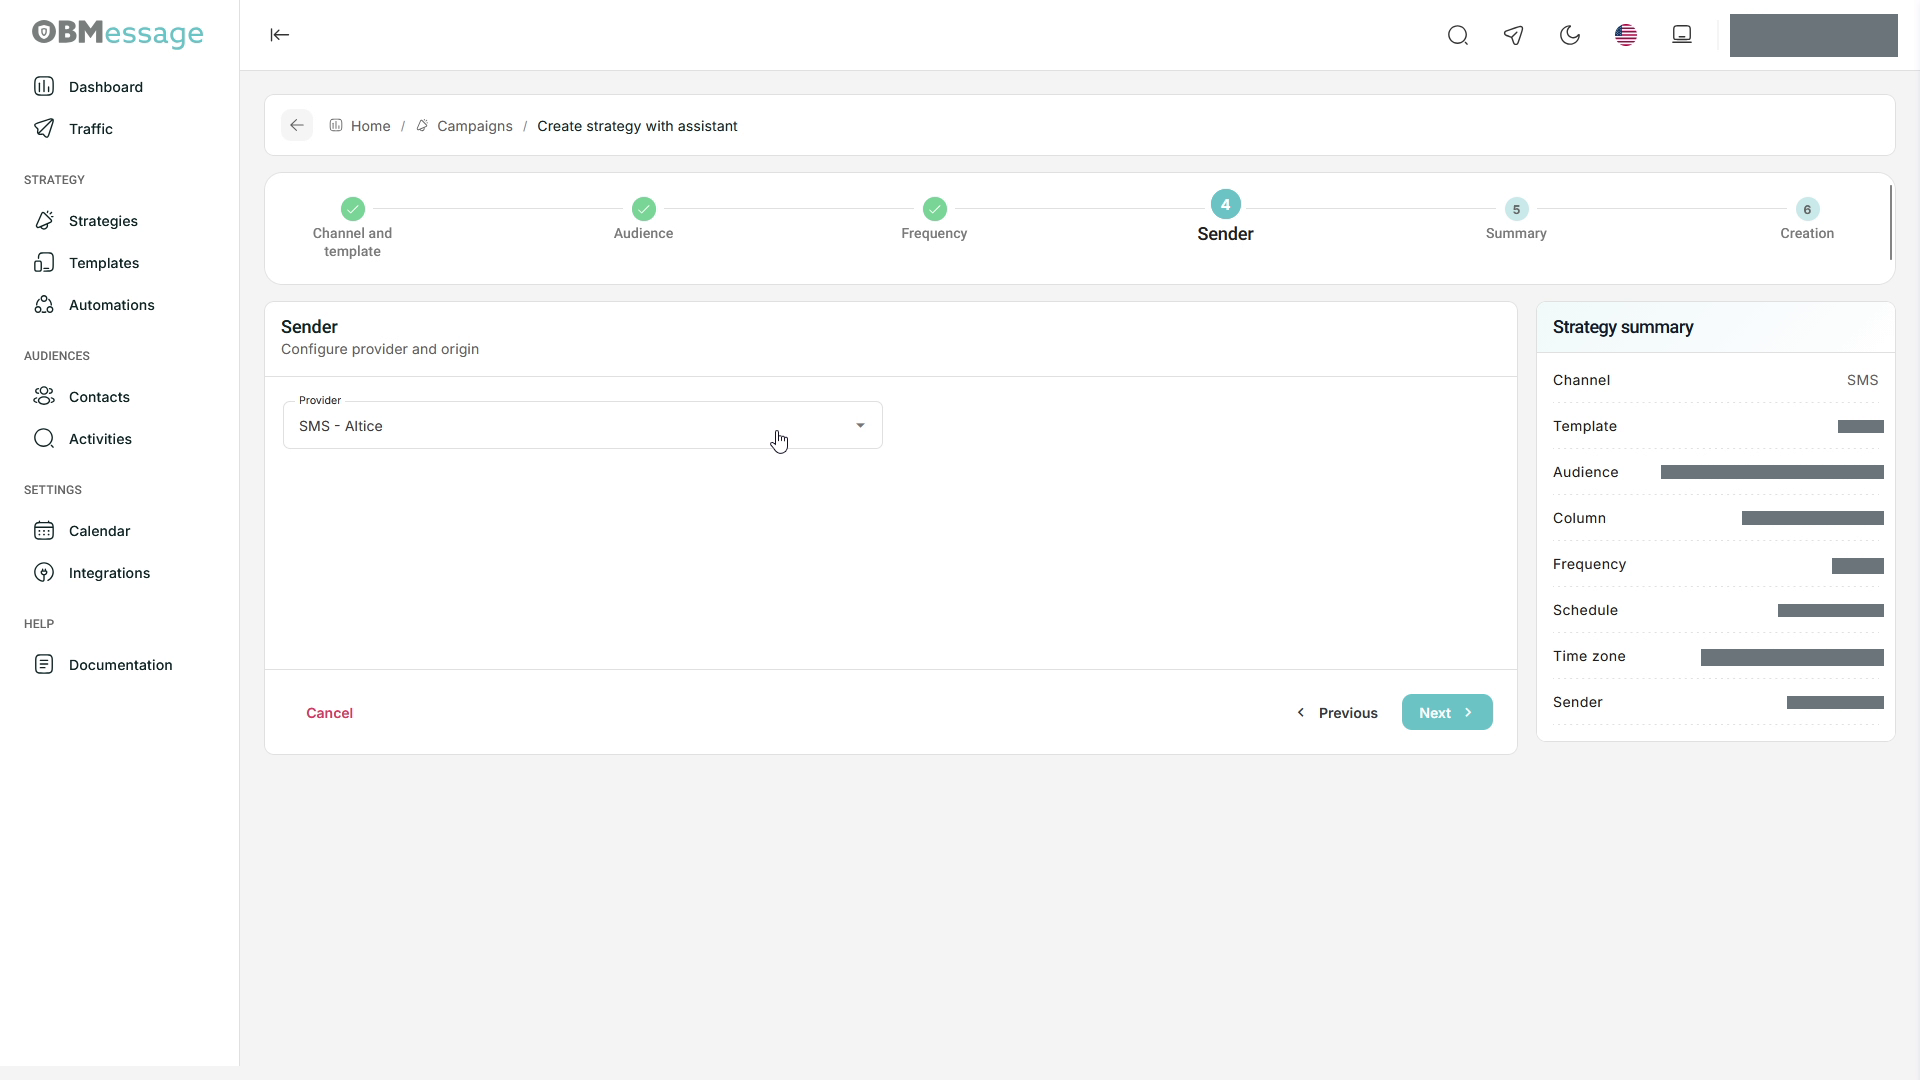
Select the provider and sender available for the channel. For Voice, complete Provider and the origin; for SMS, select Provider.
5. Summary and creation
- Review the channel, template, audience, frequency, and sender.
- Use Previous to correct a value, or Cancel to leave.
- When the configuration is correct, select Create and start.
- Review the application response and the strategy status in the list.
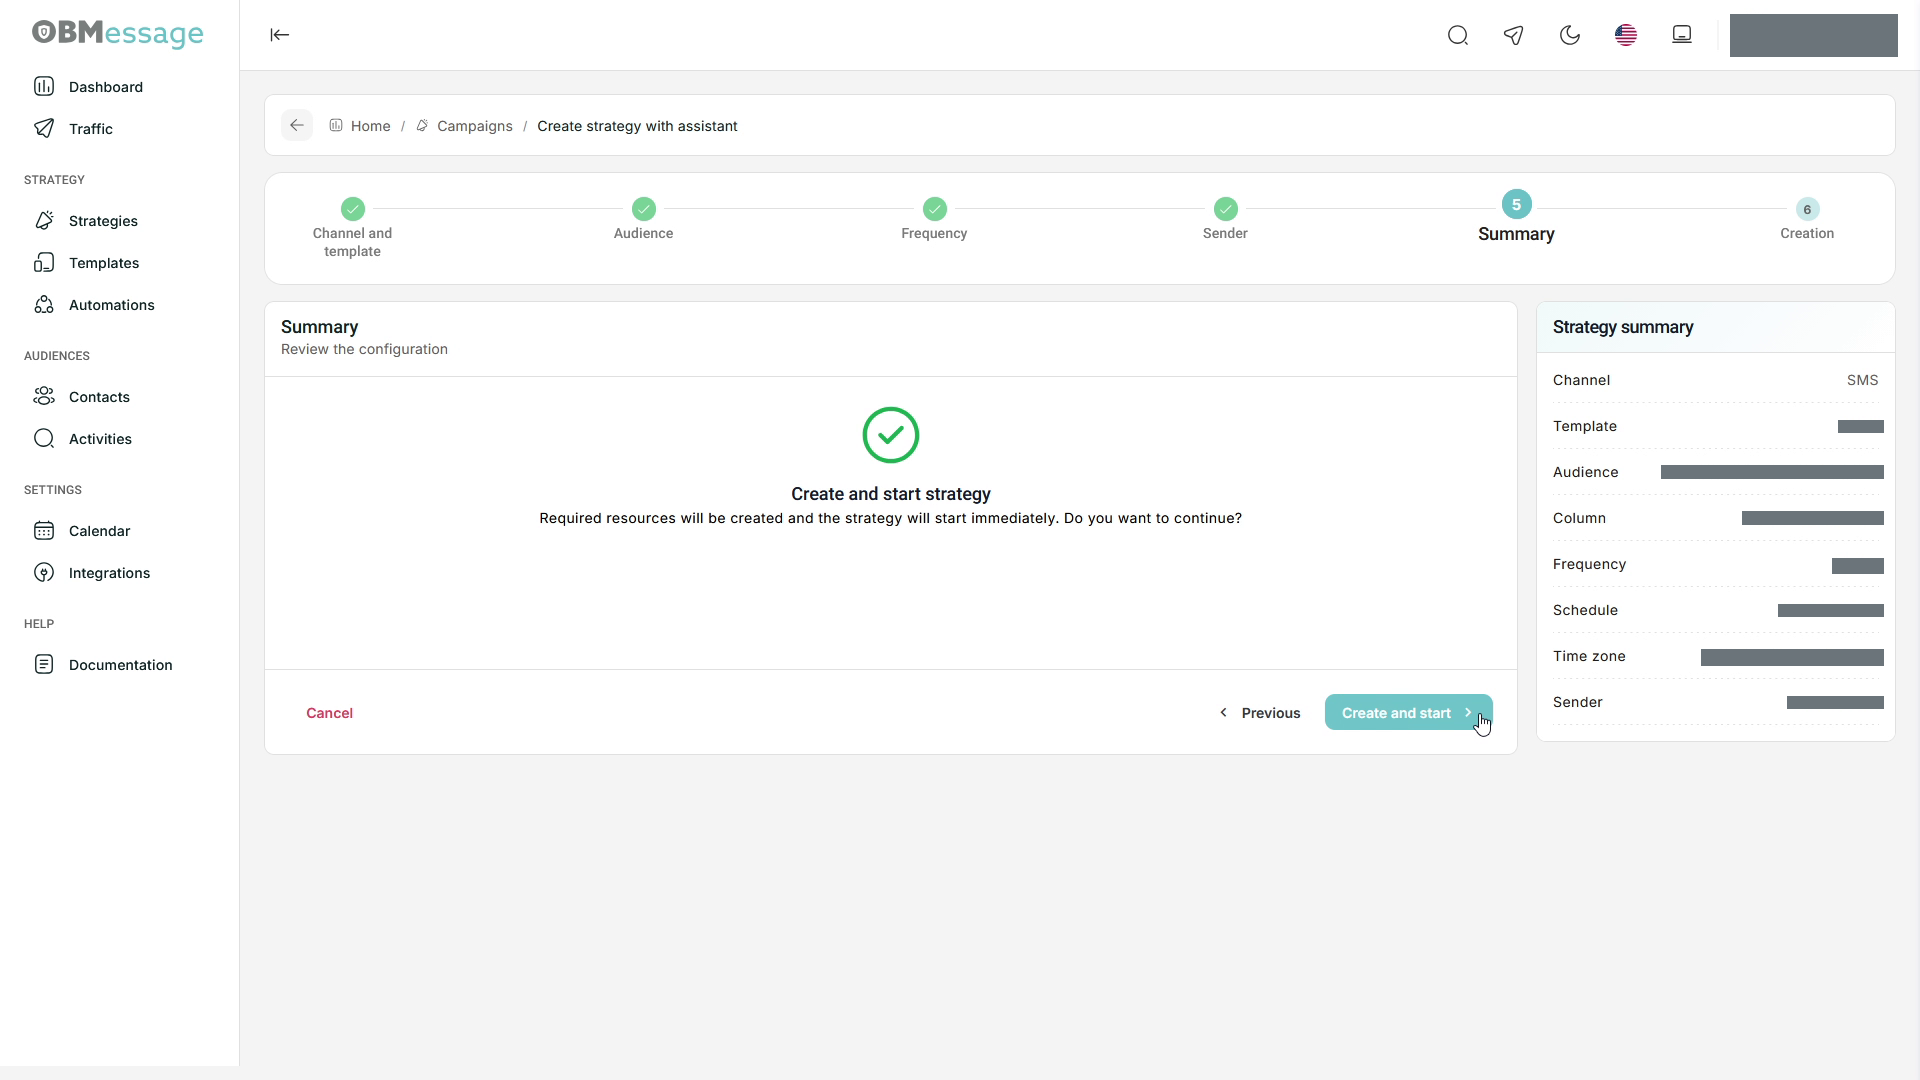
Create and start requests strategy creation and startup. Delivery depends on the schedule and configured conditions; creation confirmation is not confirmation of message delivery.
Advanced creation
- Open Create strategy → Advanced.
- Complete Name and select Type before configuring the channel sections.
- Select Template and complete Start date, End date, Time zone, and Description.
- Configure Status and Interactive for the strategy's purpose.
- Complete Audience, Schedules, and Channel.
- Review the summary and confirm creation using the action available in the form.
- Check the resulting status in the strategy list.
If a section requests a type, complete Type before continuing.
Edit an existing strategy
- Find the strategy in the list and open its editor from the row actions.
-
Review general information and the sections you want to change:
Section Content Audience Contacts and filters. Schedules Schedules and frequency. Channel Senders. Colas de notificación Associated notification queues; this label may remain in Spanish. -
Review the side summary and select Save to keep the changes.
- To request execution, select Start and check the resulting status.
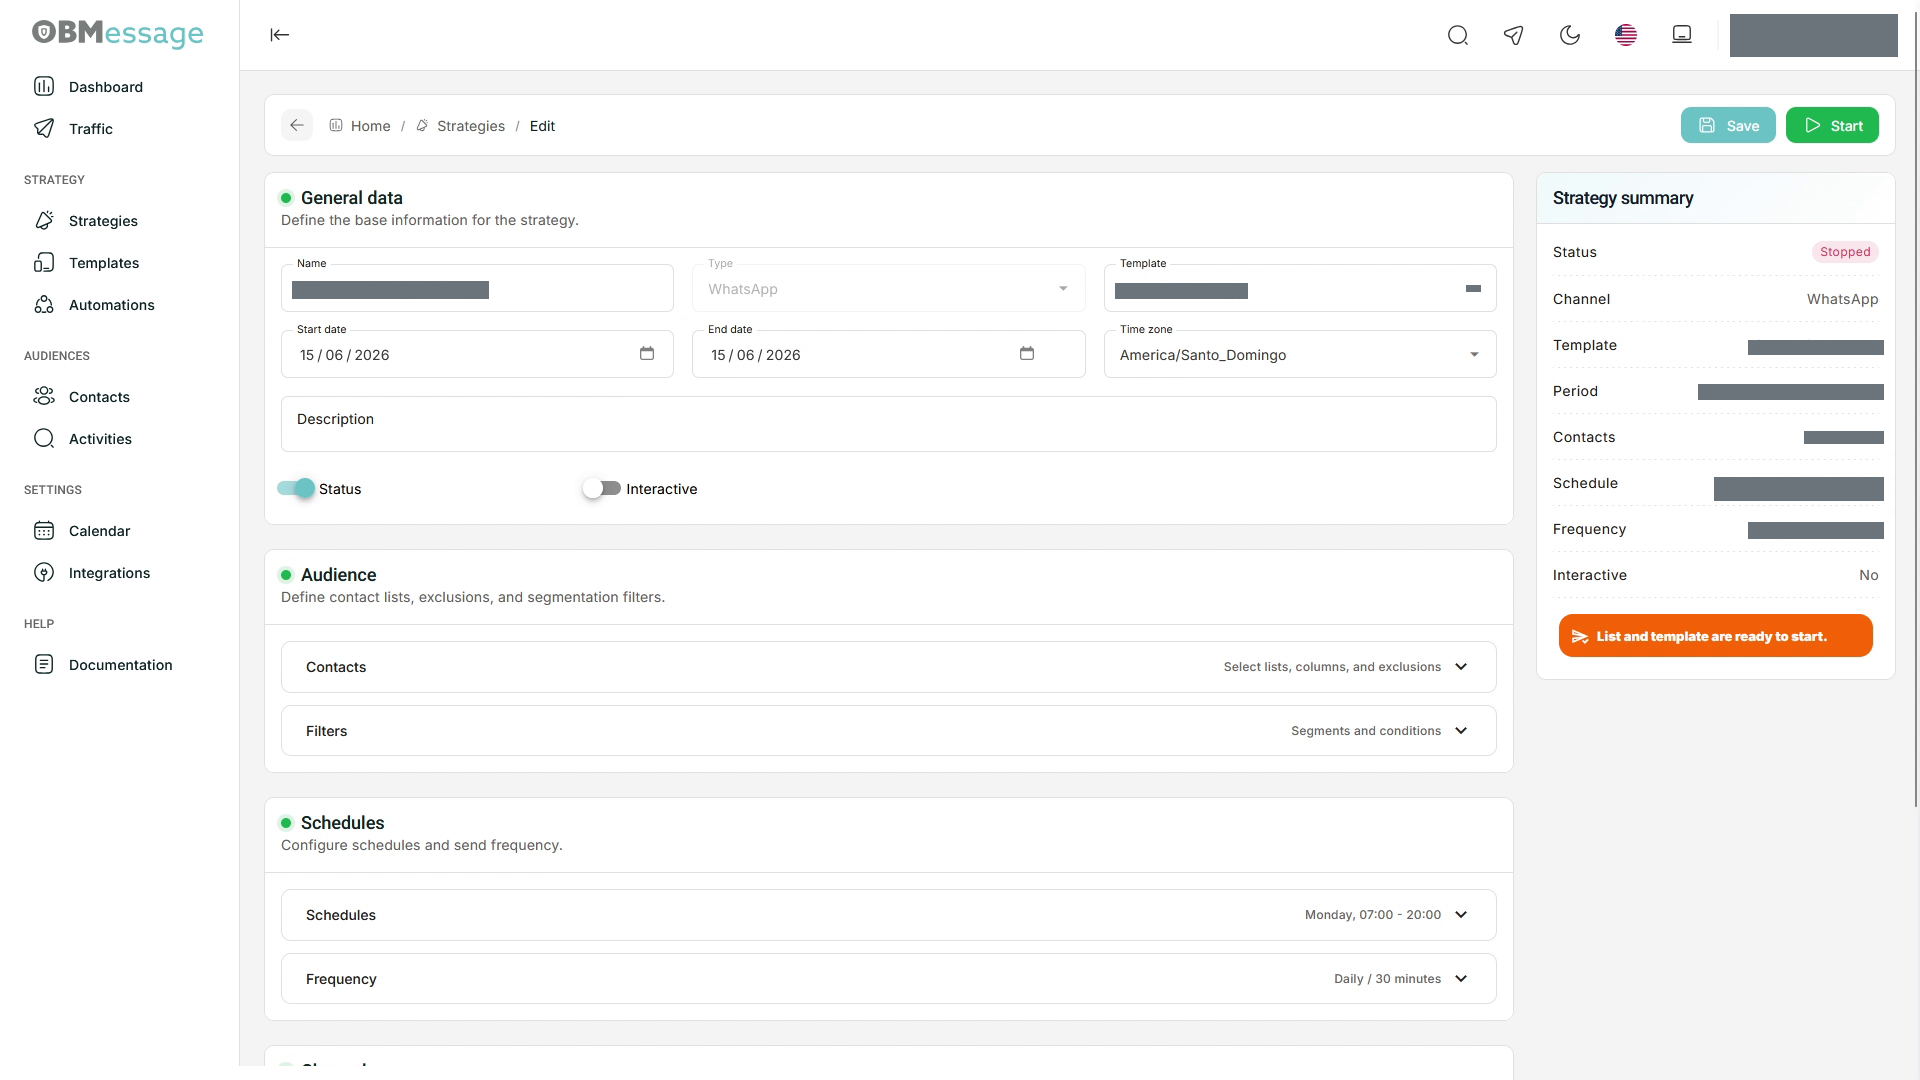
Save, Start, and the Status switch serve different purposes. To check delivery results, see Activities.