Block list
In this section, you can create, view, and manage block lists in OBMessage.
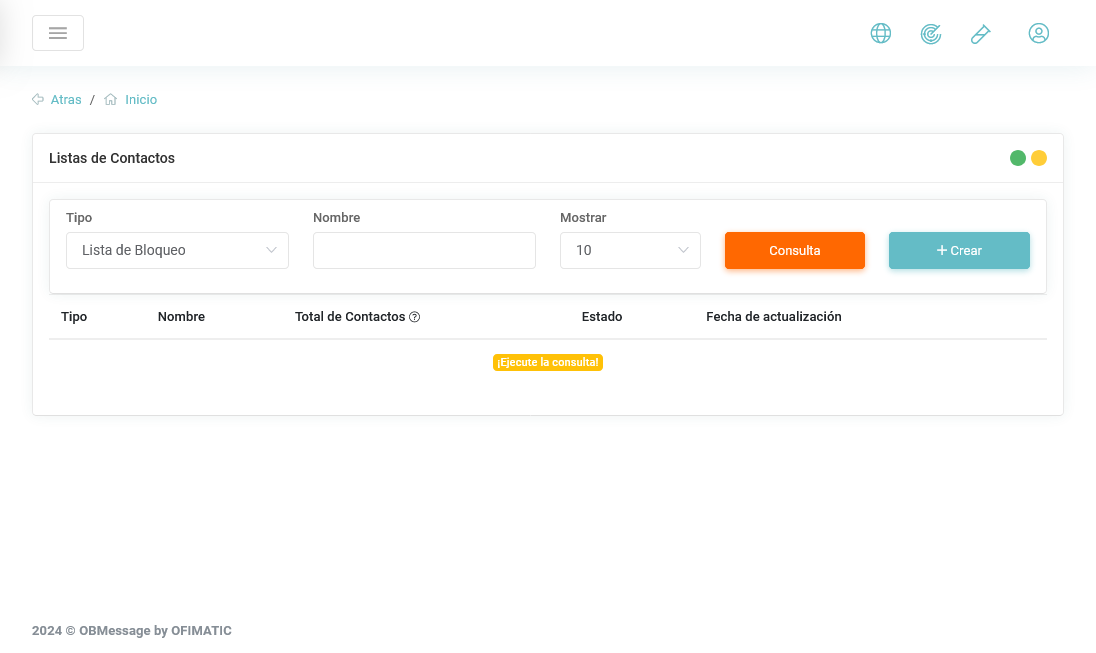
Table details
In the table, you can:
-
Search for a block list using the
Queryoption, located in the orange box. -
Modify the number of items displayed per page.
- Type: shows the type of block list.
- Name: shows the name assigned to the block list.
Considerations
You can leave this field empty to display all block lists without applying a name filter.
- Total contacts: shows the total number of contacts included in the block list.
- Status: shows the current status of the block list.
- Update date: shows the date when the block list was updated.
Create block list
In this section, you can import a block list into OBMessage.
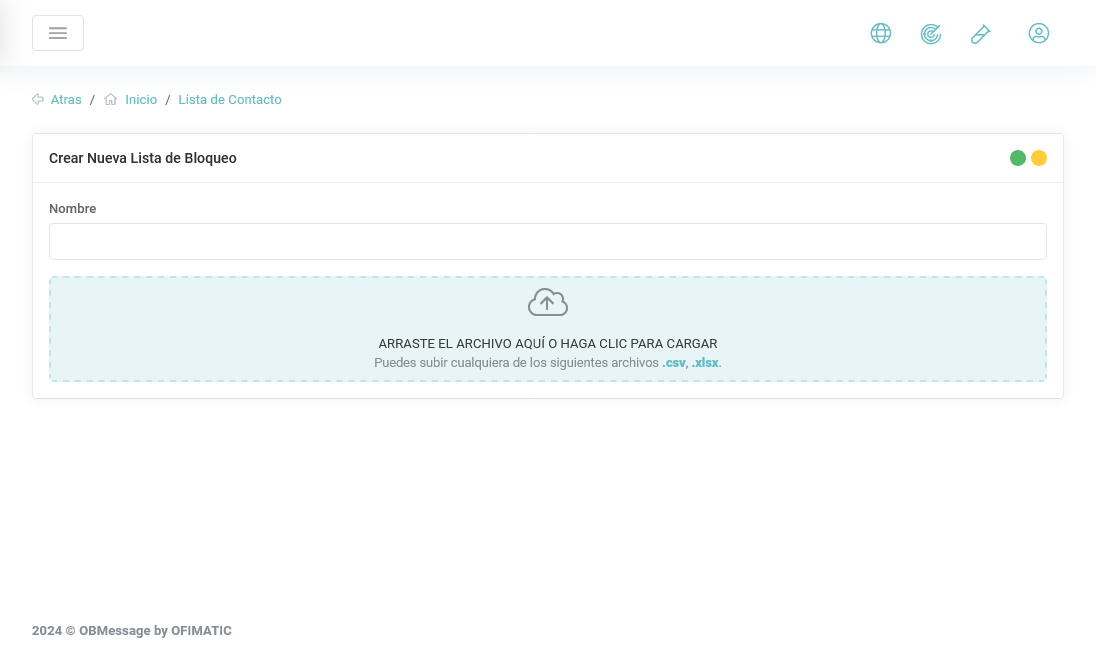
-
Name: unique identifier of the block list.
-
Description: brief description of the block list.
When you add a file, either .xlsx or .csv, it is displayed as follows:
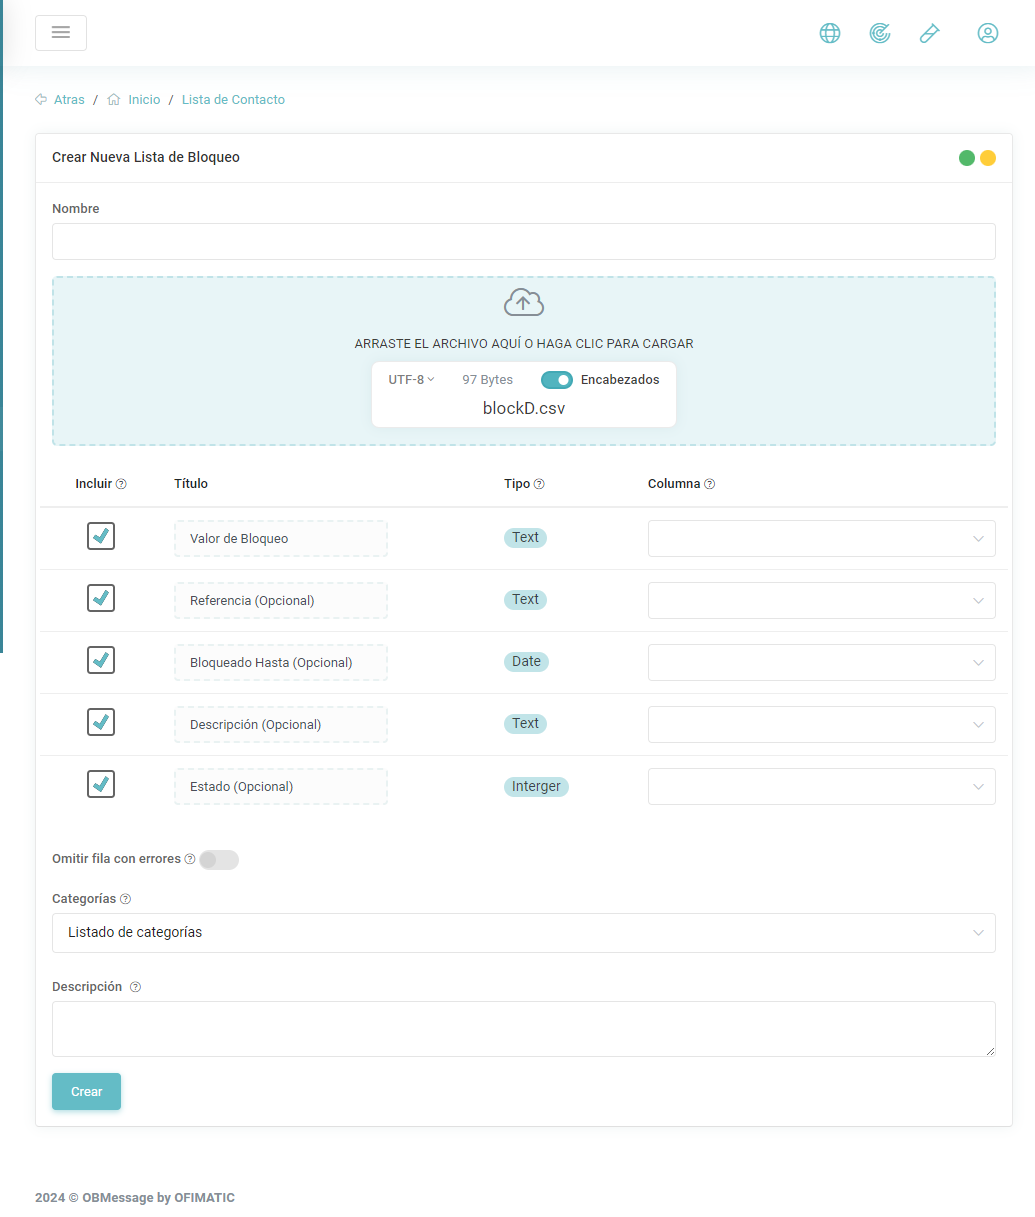
The image displays the following columns:
- Block value: value that will be used to apply the block.
- Reference: reference associated with the item being blocked.
- Blocked until: date until which the contact will remain blocked.
Considerations about Blocked until
If this column is left empty, the contact will remain blocked indefinitely.
- Description: description of the block applied to the contact.
- Status: indicates whether the contact will be blocked or not.
Considerations
- The columns in block lists are optional. Only the block value is required.
Block list details
The block list details section displays the following fields:
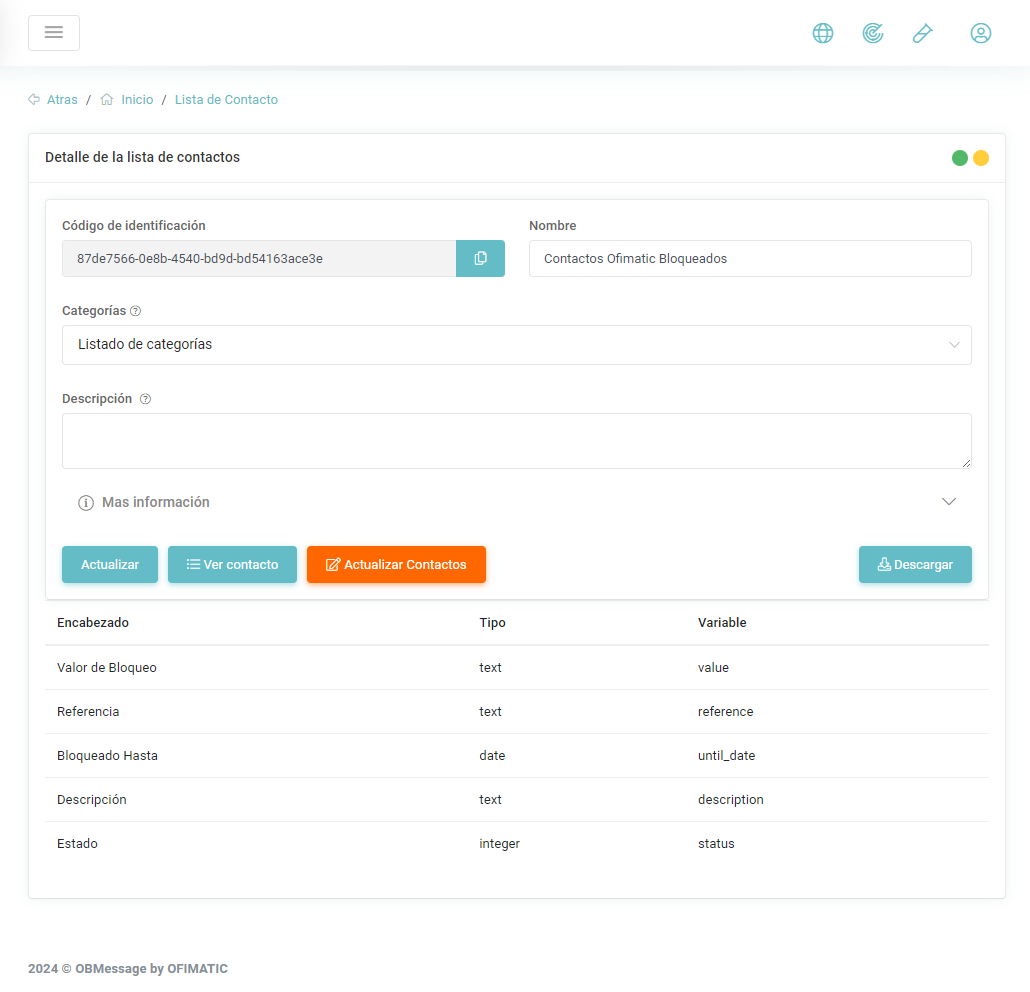
This section displays the following information:
- Identification code: unique code of the uploaded block list.
- Name: name assigned to the block list when it was uploaded.
- Categories: categories added when the block list was uploaded.
- Description: description added to the block list.
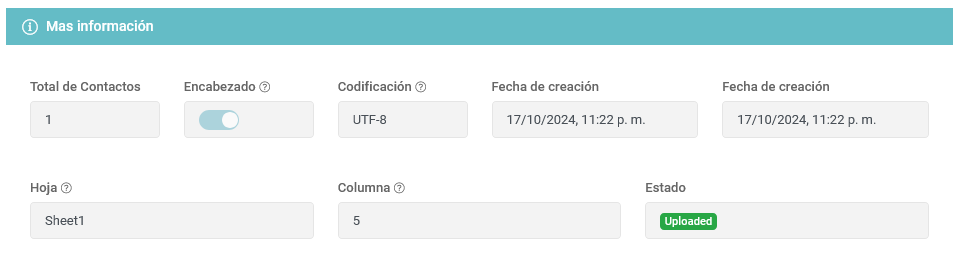
More information
The more information section displays technical details of the uploaded block list.
Automatically update block list
To automatically update a block list, upload a .csv or .xlsx file with the same structure used in the previous upload.
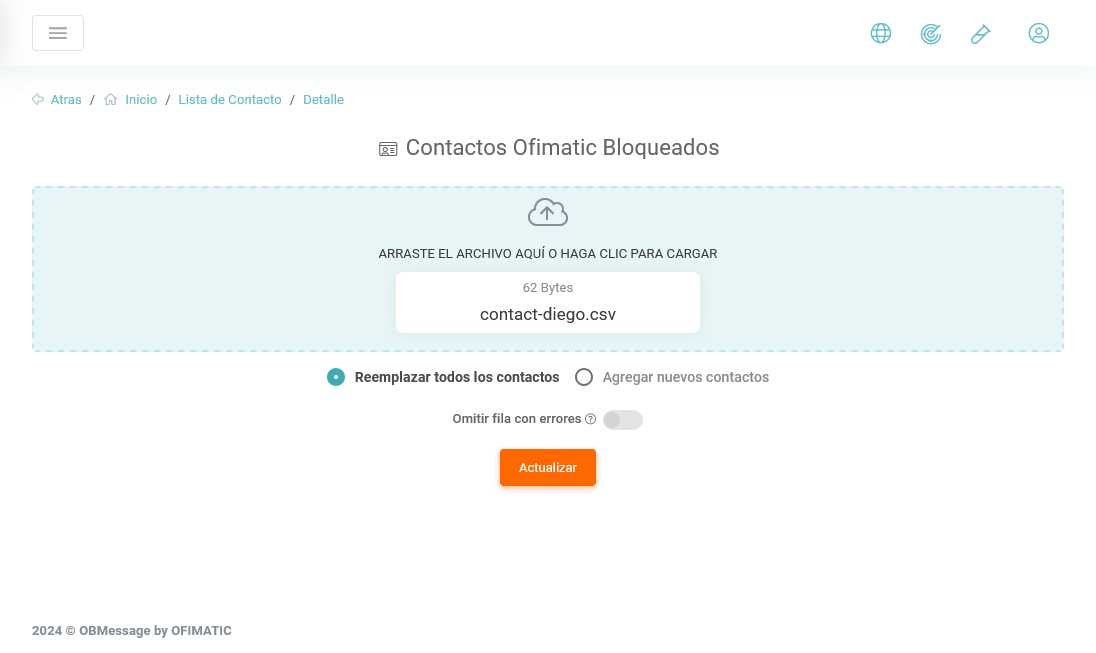
You can replace all existing blocked contacts with the newly uploaded contacts or add only the new blocked contacts to the existing list.
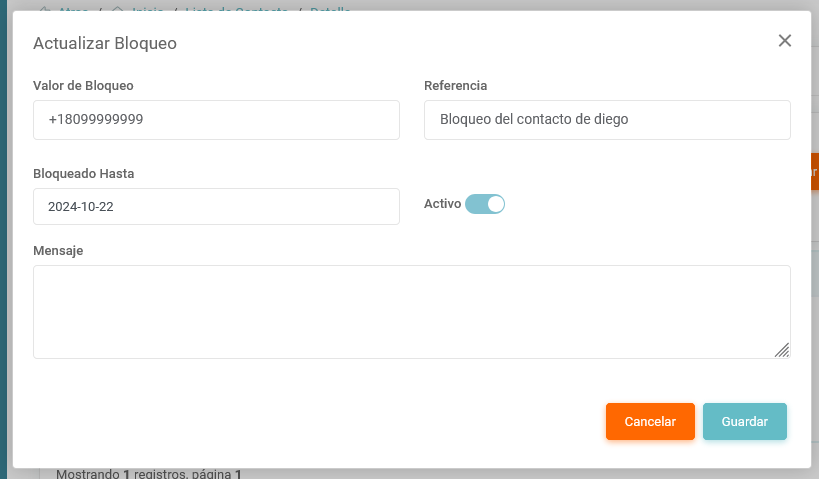
Manually update block list
To update blocked contacts manually, you can do so from the loaded blocked contacts view. From this view, you can add new blocked contacts or edit existing contacts.
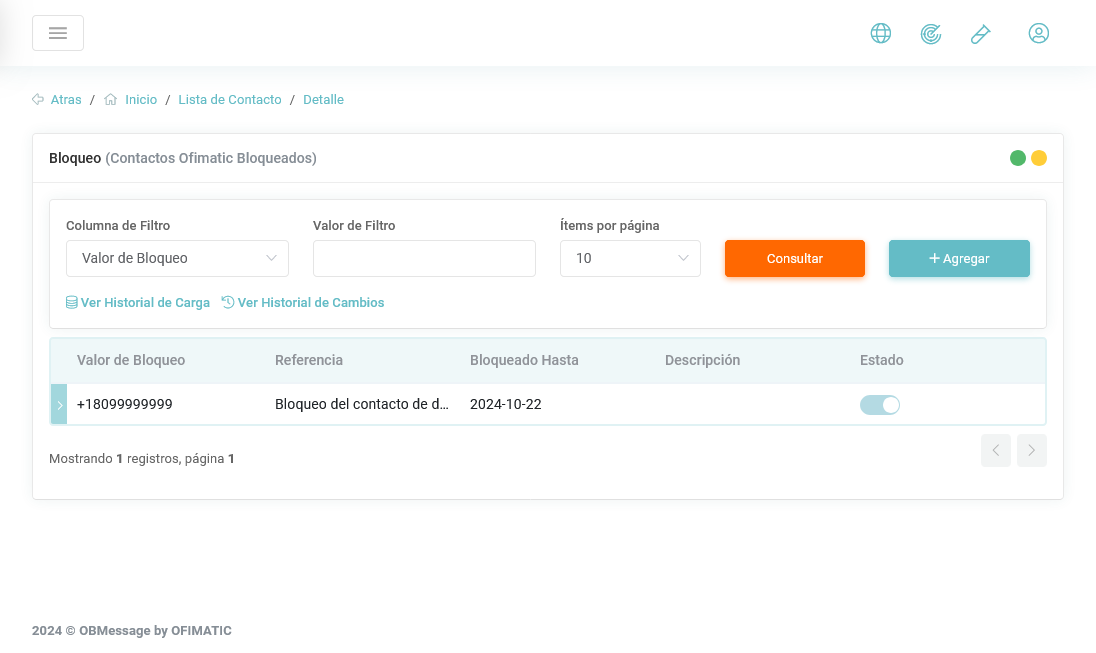
View loaded blocked contacts
When you click the query button, the following view is displayed:

The table displays additional buttons that allow you to perform the following actions:
- View: allows you to see the records loaded into the block list. For more details, see View contacts.
- Delete: allows you to delete the uploaded block list.
- Update: allows you to update the uploaded block list.
View contacts
In this section, you can view the content of the block list you created.
Block list history
This section displays the block list upload history, including the following information:
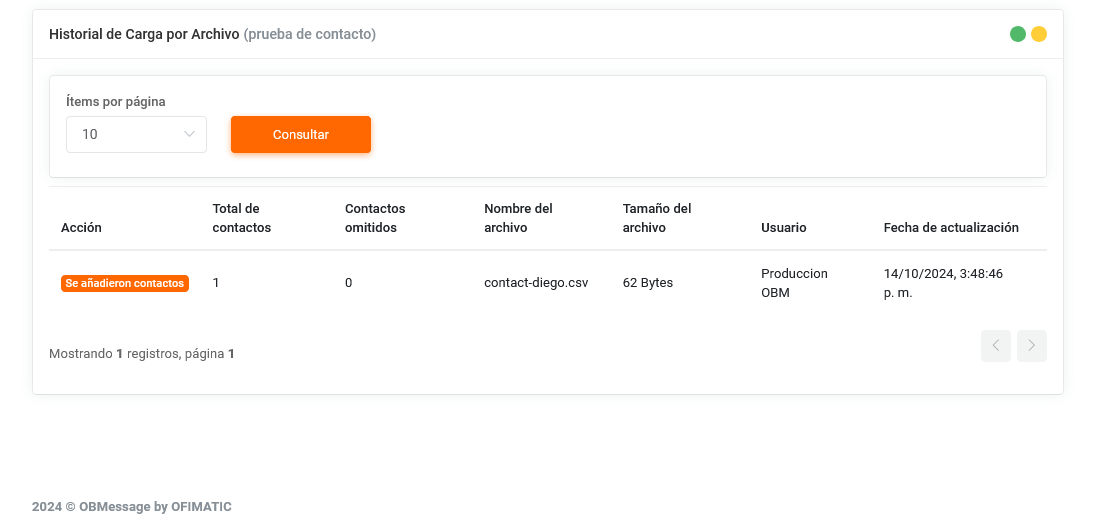
- Action: action performed by the user on the block list.
- Total contacts: total number of uploaded contacts.
- Omitted contacts: contacts that were omitted during upload.
- File name: name of the uploaded file.
- File size: size of the uploaded file.
- User: user who performed the upload or change.
- Update date: date when the changes were made to the block list.
Note
The history shown in the previous image corresponds to changes made automatically.
In the contact history, you can also view changes made manually to each blocked contact.
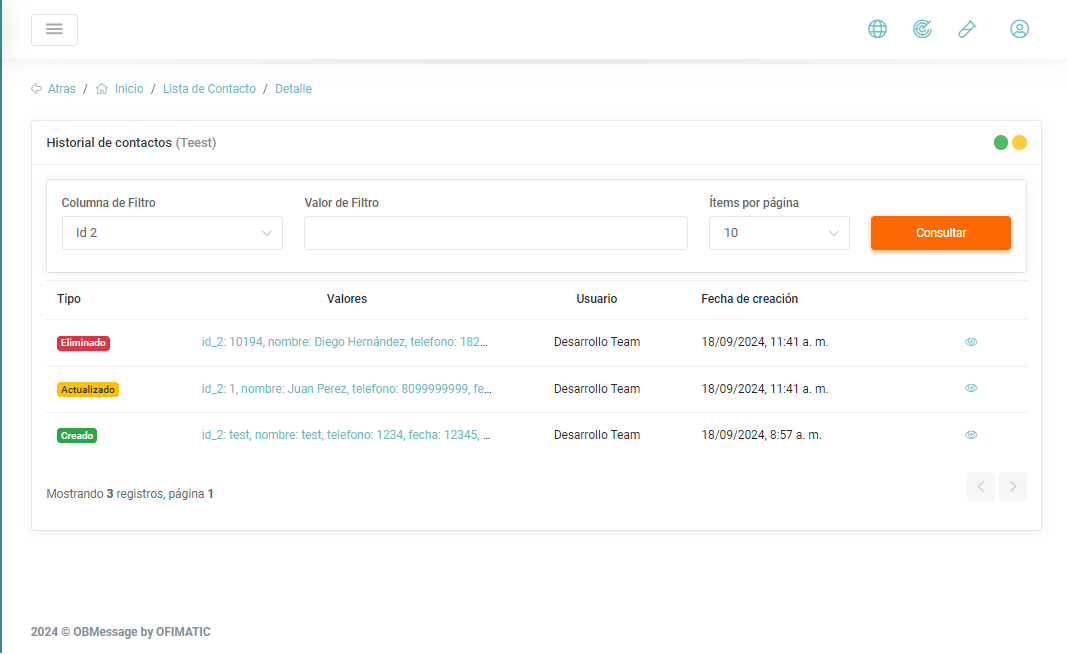
- Type: type of change performed. It can be:
- Updated
- Created
- Deleted
- Values: values affected when the modification was made.
- User: user who made the change.
- Creation date: date when the record update was made.