Campaign creation and update
Simple campaign creation
In this section, you can create a campaign using the creation wizard, designed to make the process easier step by step.
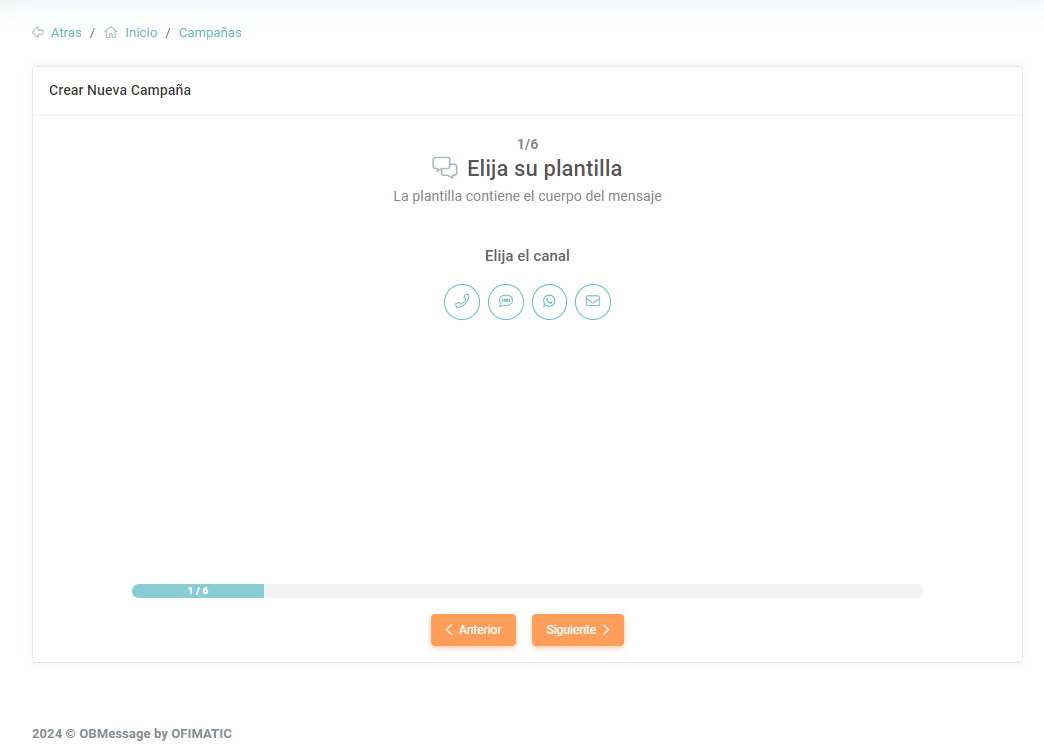
When using the wizard, the page guides you step by step through the options you need to select.
Step 1: Choose a template
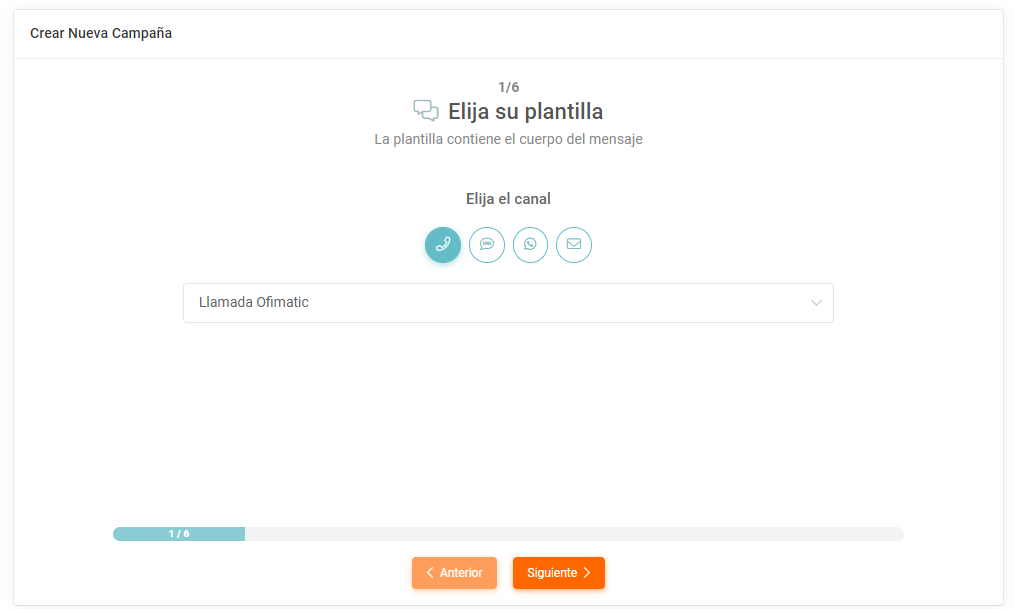
The first step is to select a template. To do this, choose the channel through which the notifications will be sent.
Step 2: Choose contacts
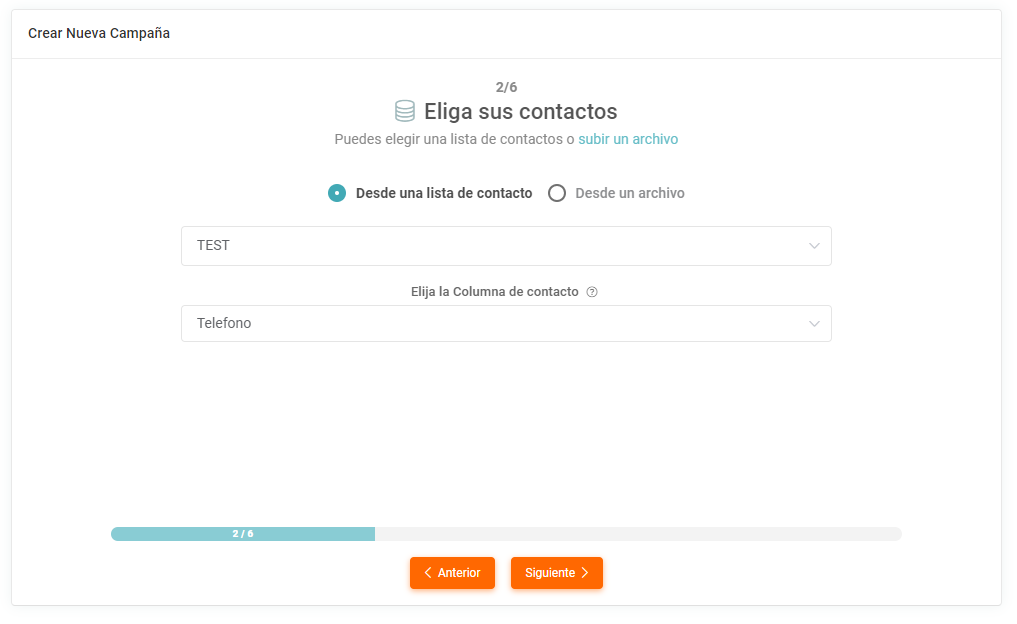
The second step is to select or upload a contact list, depending on what is required. You must also select the column that contains the contact data, whether it is the phone number or the email address.
Step 3: Sending frequency
The third step is to set the schedule and frequency with which notifications will be sent. The available options are:
- Today: notifications that will be sent during the current day.
- Daily: notifications that will be sent once a day.
- Every other day: notifications that will be sent every two days.
- Weekly: notifications that will be sent every week.
- Monthly: notifications that will be sent once a month.
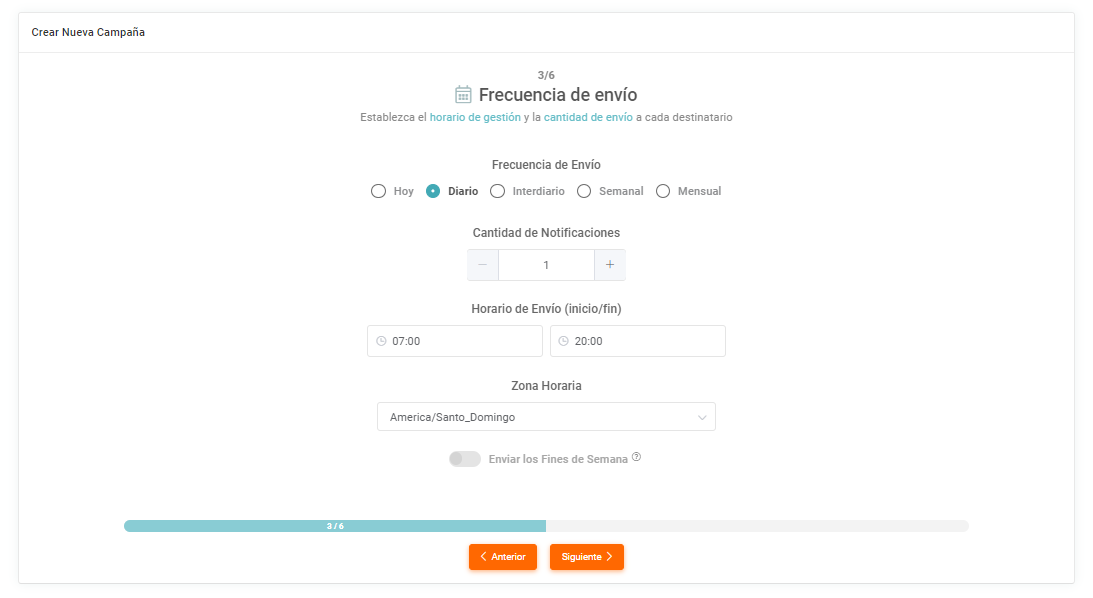
Weekend delivery
This option is enabled when one of the following frequencies is selected:
- Daily
- Every other day
- Monthly

Step 4: Sender configuration
The fourth step is to configure the campaign sender by selecting the provider and, when applicable, the sender.
If you use WhatsApp or SMS channels, it is not necessary to specify a sender; you only need to select the provider. If it is an email campaign, you must configure the corresponding alias.
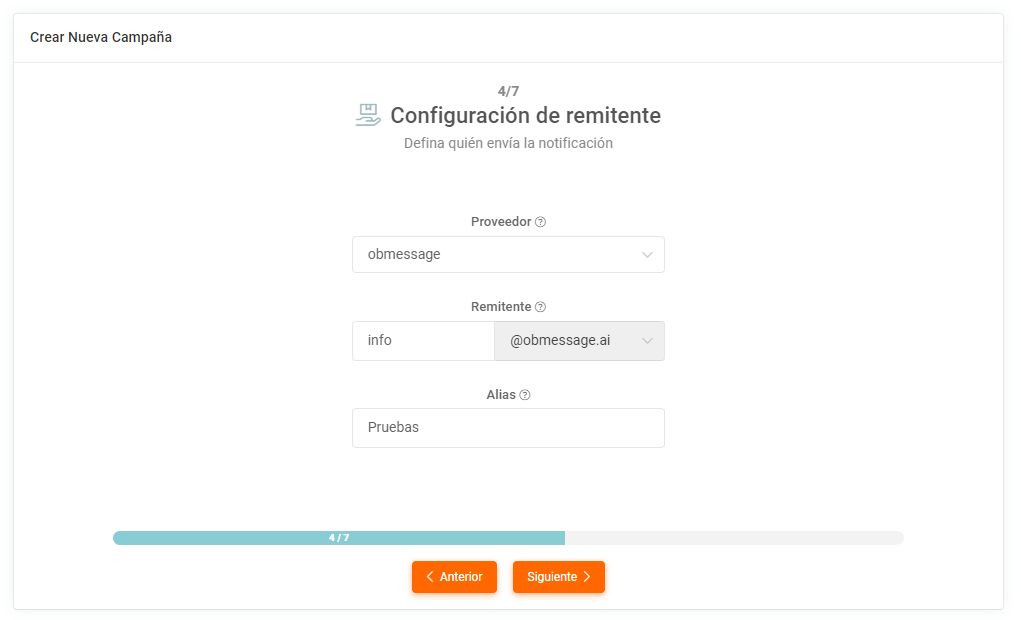
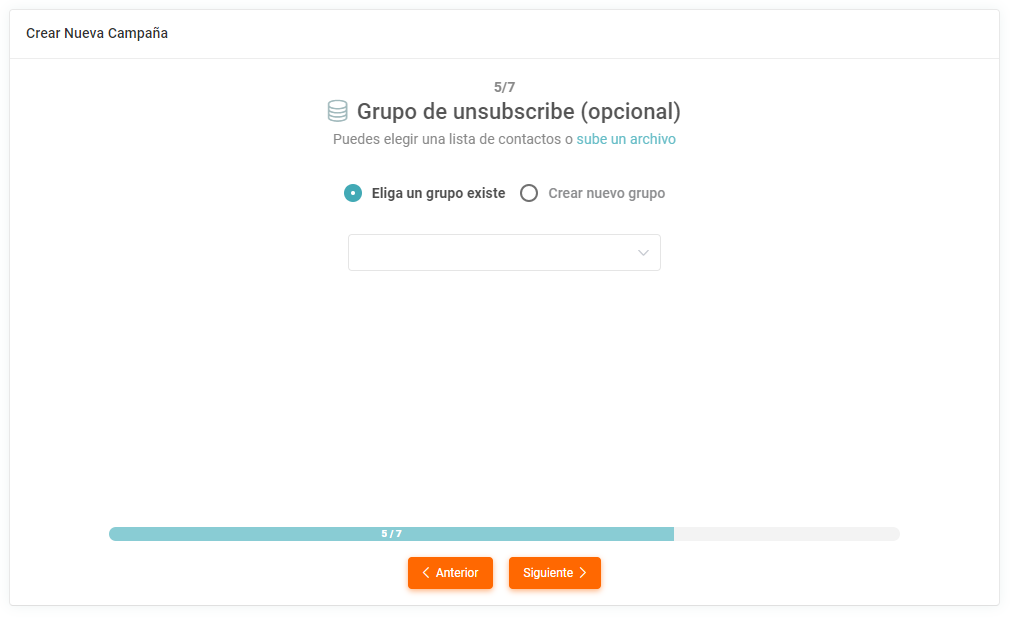
Step 4.5: Unsubscribe group (Email)
This step only applies when creating an email campaign. In this case, you must select a previously created unsubscribe group. If you do not have one created, you can select an available unsubscribe group.
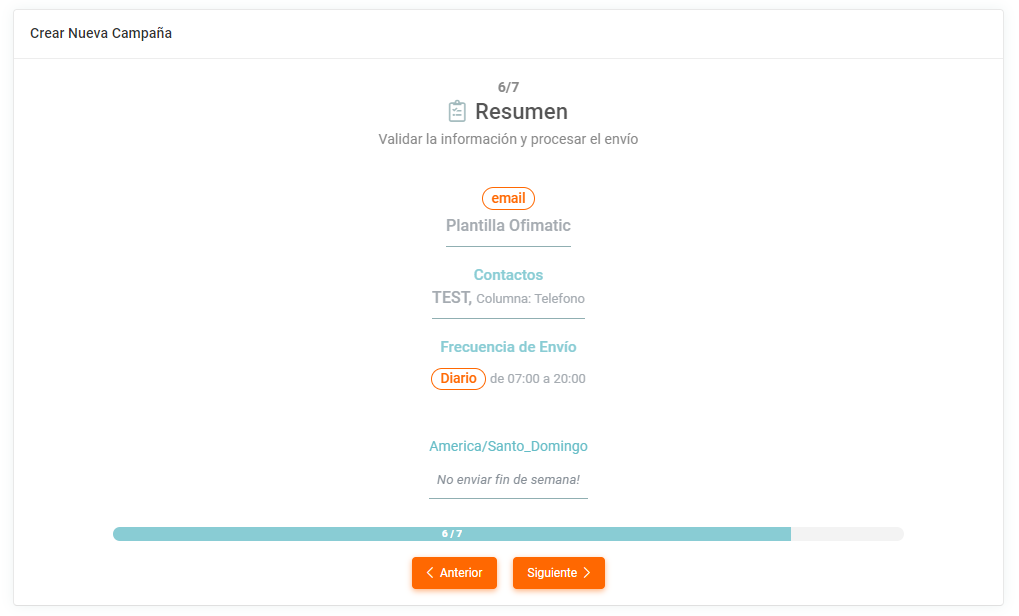
Step 5: Summary
A summary of the campaign to be created is displayed, and the campaign starts automatically.
Advanced campaign creation
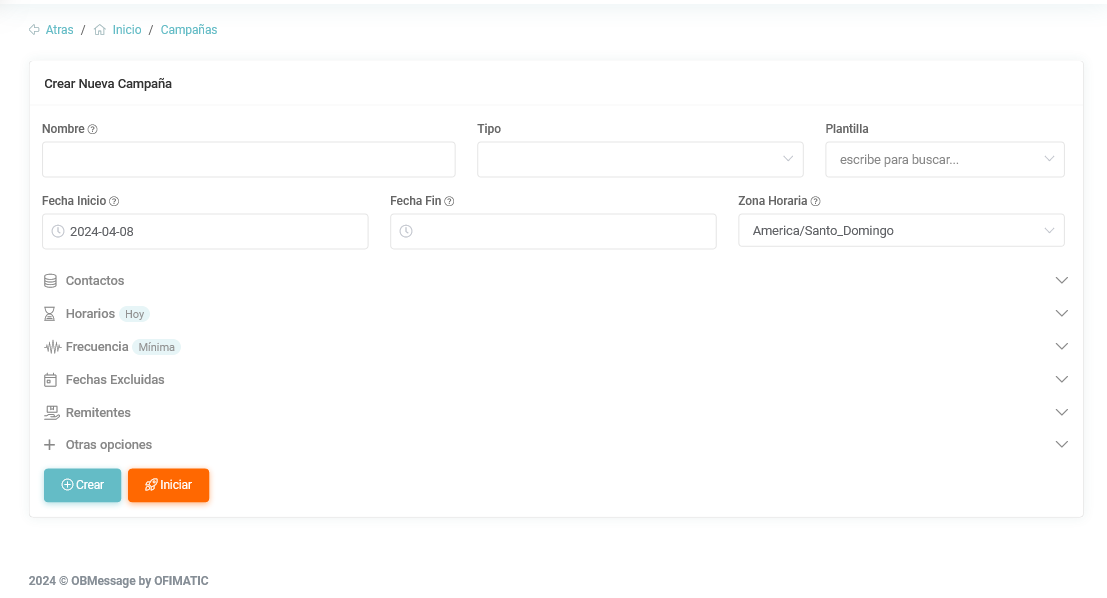
In this section, you can create a campaign with a more specific configuration.
-
Name: unique identifier of the campaign.
-
Template: previously created template that will be used in the campaign. For more information, see the template section.
-
Type: type of campaign to be used.
-
Contact list to notify: contact list to which the campaign delivery will be directed. For more information, see the contacts section.
-
Excluded contact list: list of contacts blocked or excluded from the campaign. For more information about excluded or blocked lists, see this link.
-
Start date: date when the campaign will start.
-
End date: date when the campaign will end.
-
Schedules: schedule when notifications will be sent.
Information about schedules
You can modify the following values:
- Days
- Start time
- End time
- Enabled
- Every month
- Frequency: frequency with which each notification will be sent.
Information about frequency
You can modify the following values:
- Days
- Interval minutes
- Maximum effective notifications per day
- Effective notifications
- Number of retries
- Maximum retries per day
-
Excluded dates: dates when notifications will not be sent.
-
Other options: displays the Category section and the campaign description being created.
-
Description: brief description of the campaign.
Update campaign
In this section, you can edit an existing campaign.
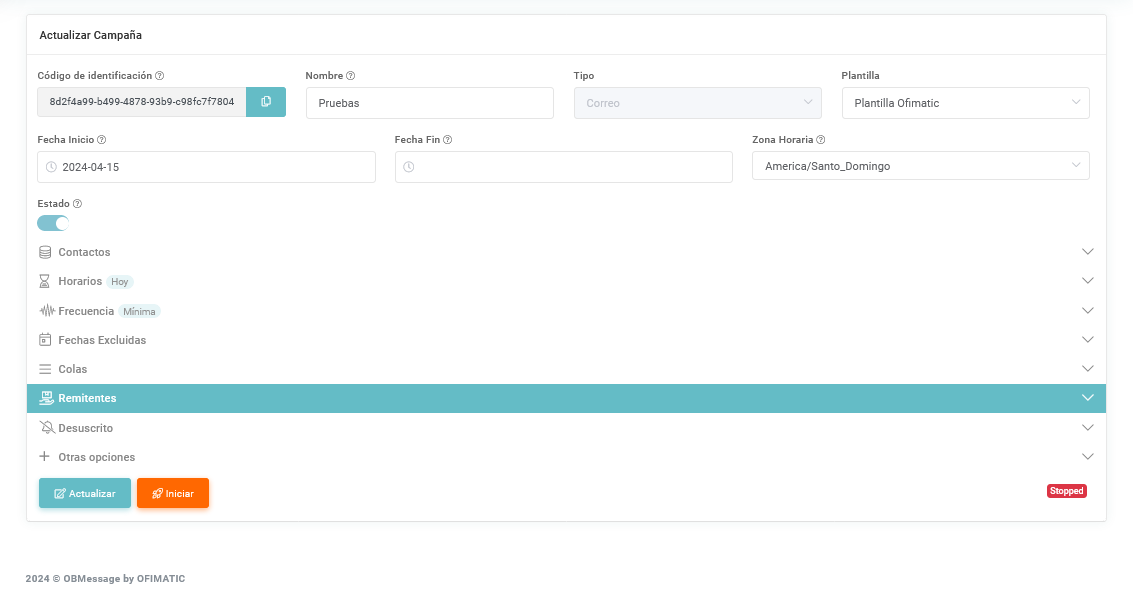
In the campaign update view, the contact queue section is displayed.
Contact queue
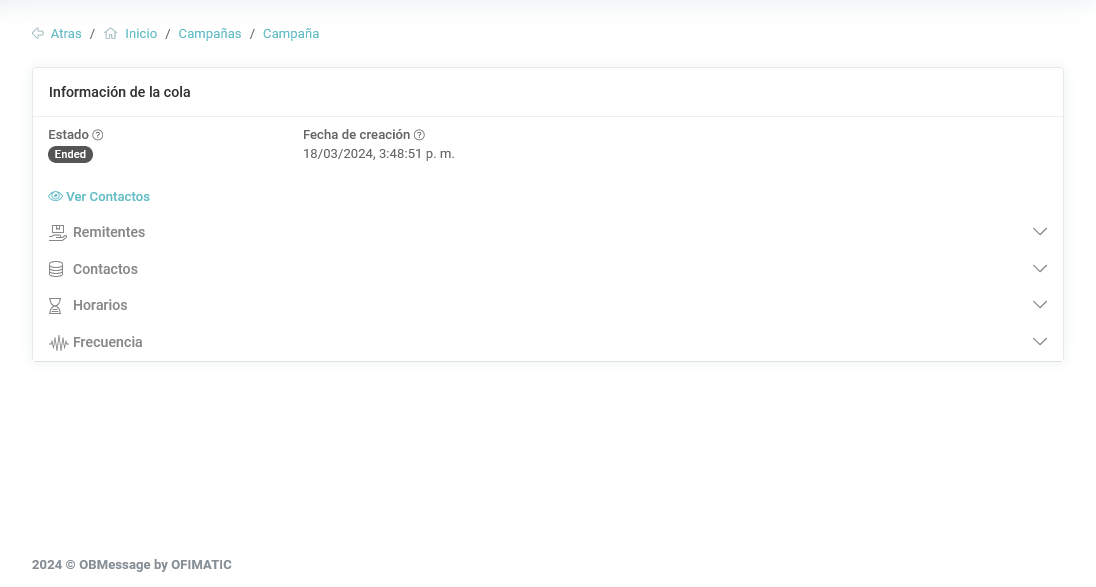
In this section, you can view the contacts loaded to be notified.
-
Senders: shows the senders added when the campaign was created.
-
Contacts: shows the contact list loaded when the campaign was created.
-
Schedules: shows the schedule configured for the campaign.
-
Frequency: shows the notification frequency configured for the campaign.
Contact queue considerations
To view the contacts that will be notified, click the "View Contacts" button.